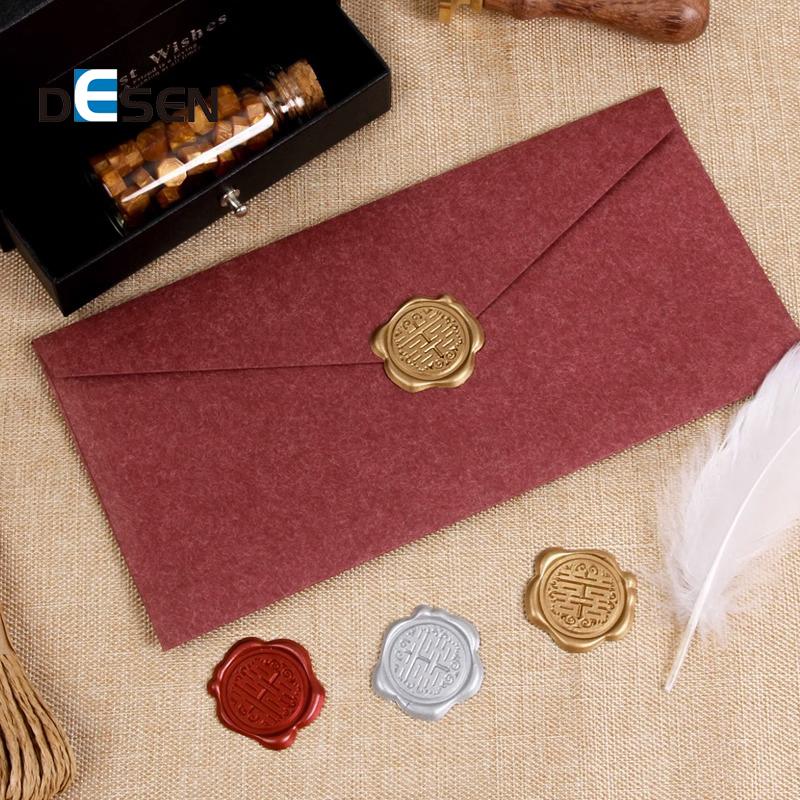
How To Seal A Letter With A Wax Stamp
September 28, 2023
Sealing a letter with a wax stamp is a journey back to a more elegant time. It adds charm, personal touch, and a hint of mystery to your messages. Whether it's a special note or a formal invitation, a wax seal elevates its importance. But how do you create this beautiful touch at home? Don't worry! With a few simple tools and techniques, you can master the art of wax sealing. Let's visit into the enchanting world of wax stamps and discover how to give your letters that magical finish!
Can I put a wax seal on a letter?
Of course, you can put a wax seal on a letter! Wax seals give letters a classic, personal touch. First, write and fold your letter. Then, melt some sealing wax. Drip the melted wax onto your envelope's flap. Quickly, before it dries, press your seal stamp into the wax. Lift it gently after a few seconds. Now, you have a beautifully sealed letter! If mailing, consider using an outer envelope to protect your seal. It's a lovely way to add charm to your message.
How to seal a letter with a wax stamp?
Sealing a letter with a wax stamp is like taking a step back in time. It's an art that adds charm, elegance, and a personal touch to your messages. Whether you're sending a special invitation, a heartfelt thank you, or just want to impress a friend, a wax-sealed letter is the way to go. So, how can you master this delightful skill? Let's delve in!
1. Gather Your Supplies
First things first, you'll need the right tools. Here's what you should have on hand:\
A wax stick or bead: These come in various colors, so pick one that resonates with you.
A wax seal stamp: This is the fun part! Choose a design that reflects the message or your personality.
A source of heat: A lighter or a candle works best.
Your letter: Of course!
2. Write Your Letter
Before you even think about sealing, get your thoughts down on paper. Write your letter, expressing everything you want to say. Once you've poured out your heart or shared your news, fold the letter and place it in its envelope.
3. Prep the Envelope
Lay the envelope on a flat surface with the flap up. Ensure you're in a well-lit area. This will help you see the wax melt and know when it's enough.
4. Heat Your Wax
If using a wax stick with a wick, light the wick just as you would a candle. If your wax doesn't have a wick, hold it near the flame from a lighter or candle. Soon, the wax will start melting.
5. Apply the Wax
Once the wax starts dripping, hold it over the spot where you want your seal, usually the center of the flap. Let a few drops collect to form a small puddle. If you're using wax beads, place a few on the envelope and melt them directly there with the flame.
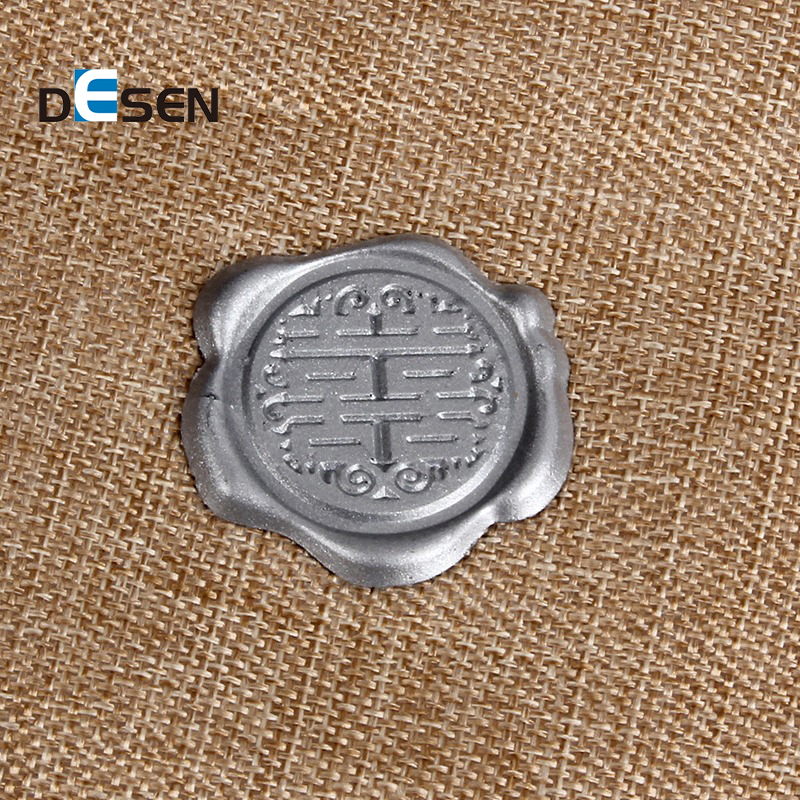
6. Stamp the Wax
Wait a few seconds after dripping the wax. Then, press your seal stamp firmly into the wax. You don't want the wax to be too runny, or the design won't set properly. But if the wax is too hard, the imprint won't form. Hold the stamp in place for about 5-10 seconds.
7. Lift and Admire
Lift the stamp gently off the wax, ensuring you don’t smudge the design. There you have it, a beautifully sealed letter!
8. Let it Dry
This step requires a bit of patience. Let the wax seal dry completely. It usually takes just a few minutes, but it's crucial to avoid touching it during this time.
9. Choose the Right Wax
There are different kinds of sealing waxes available. Some are more flexible and ideal for letters that will be mailed. Others are more traditional and brittle. Depending on your purpose, choose the one that fits best.
10. Protect Your Seal
If you're sending your letter through the mail, consider placing it inside another envelope. Postal machines can be rough, and your wax seal might get damaged. An outer envelope provides that extra layer of protection.
11. Experiment and Practice
As with any skill, practice makes perfect. The more you seal letters, the better you'll get. Try different techniques, waxes, and stamps until you find what works best for you.
12. Personalize Your Seal
Did you know you can get custom wax seal stamps made? If you're looking for a unique touch, consider getting a stamp with your initials, a personal logo, or any design close to your heart.
13. Clean Your Stamp
After using your stamp, make sure to clean it. Some wax might stick to it. Gently wipe it with a cloth to ensure it's ready for next time.
Conclusion
Sealing a letter with a wax stamp isn't just about closing an envelope; it's about adding a touch of magic and personal connection. In a digital age, such tangible tokens of affection and thoughtfulness stand out. They remind the receiver that you took an extra step, that you care, and that, in that moment, they were on your mind. So, the next time you're sending a letter, why not add that touch of timeless elegance? Seal it with wax, and watch your message transform into a cherished keepsake.
NEXT: What Is Acrylic Signage