How To Make Wax Seal Stickers
October 17, 2023
The timeless charm of wax seals never goes out of style. But did you know there's a twist to this age-old craft? Combining the elegance of traditional seals with modern convenience, these stickers offer a quick, mess-free way to add a personal touch to your projects. If you've ever wondered how to create these delightful embellishments, you're in the right place. Get ready to embark on a fun and easy crafting journey!
Do wax seal stickers work?
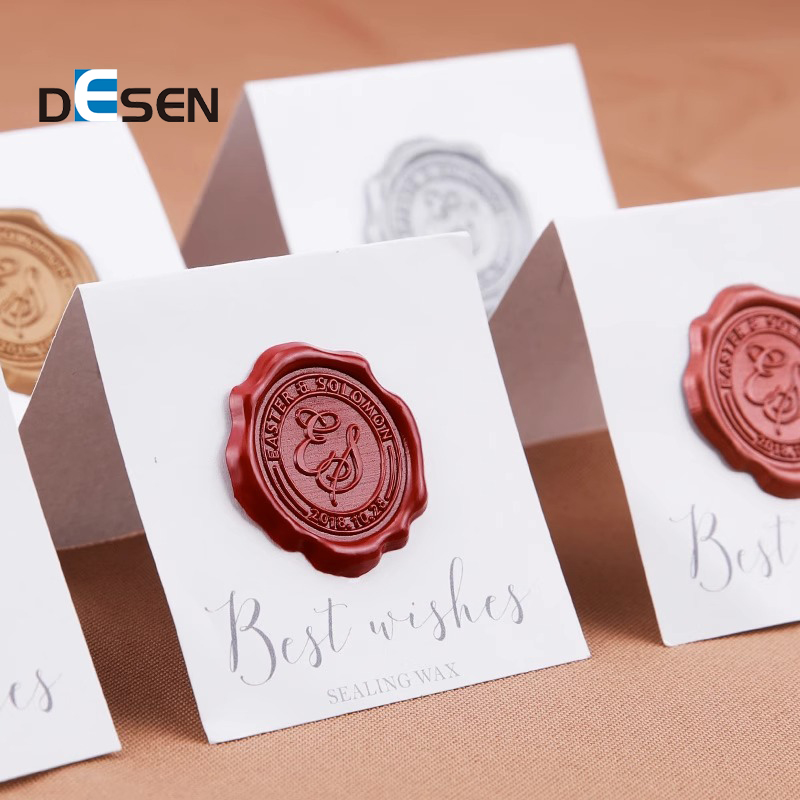
Wax seal stickers are essentially pre-made wax seals. Manufacturers create them in bulk, adhering them to a backing, much like any sticker you'd find. These stickers capture the charm and elegance of traditional wax seals without the need for melting wax or pressing stamps.
So, do they work? In short, yes! Here are some reasons why:
Easy Application
One of the best things about wax seal stickers is their ease of use. Just peel off the backing and stick! You don't need a flame, melting spoon, or stamp. This makes them perfect for those who want the look of a wax seal without the fuss.
Consistent Look
Since they're pre-made, each sticker looks uniform. This consistency is great for events like weddings or corporate functions where you want each invite or letter to look identical.
Time Saver
Imagine sealing dozens, or even hundreds, of envelopes with traditional wax. It's time-consuming! Wax seal stickers, on the other hand, allow for quick application, saving you heaps of time.
Less Mess
Melting wax can get messy. There's potential for spills or uneven seals. Stickers eliminate this issue, ensuring a clean, hassle-free experience.
Versatile
While envelopes are the classic choice, these stickers stick to various surfaces. Think gift wrapping, wine bottles, or even as decorative elements in scrapbooking!
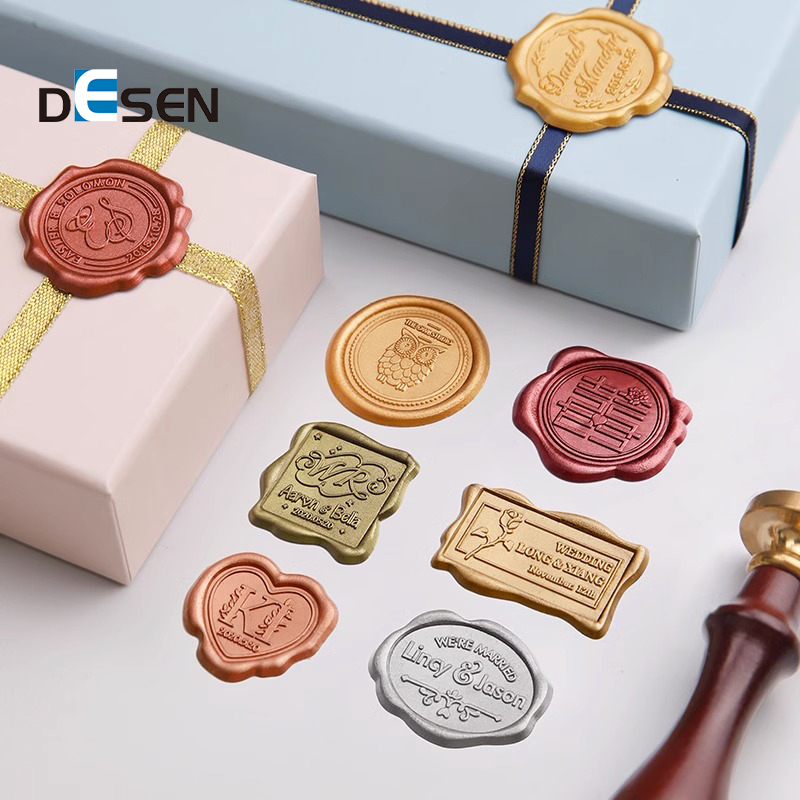
Variety of Designs
Just like traditional wax seals, these stickers come in various designs, colors, and sizes. Whether you want an initial, a heart, or a corporate logo, there's likely a sticker out there for you.
However, while wax seal stickers offer many benefits, there are a couple of things to consider:
Authenticity
For some purists, stickers might lack the authenticity and charm of traditional wax seals. The tactile experience of melting, pouring, and pressing the wax is part of the allure.
Cost
Depending on where you purchase them, wax seal stickers might be pricier than making seals yourself, especially if you need many.
Wax seal stickers certainly do work, especially for those looking for a convenient and consistent alternative to traditional wax seals. They offer a blend of elegance and ease that appeals to many.
How to make wax seal stickers?
The allure of wax seals lies in their vintage charm and elegance. But what if you could enjoy this beauty without the traditional sealing process every time? Let’s explore how to make these beauties.
1. Gather Your Supplies
Before we start, ensure you have everything ready. You'll need:
Sealing wax (sticks or beads)
A wax seal stamp with your chosen design
A silicone mat or baking paper
Adhesive sticker sheets or double-sided adhesive dots
A melting spoon and a heat source (like a candle)
2. Melting the Wax
Place a few wax beads or a portion of a wax stick into your melting spoon. Hold it over your heat source. Watch as the wax melts into a smooth, liquid consistency.
3. Pouring the Wax
Once melted, carefully pour the wax onto your silicone mat or baking paper. Aim for a circle, but don't stress about perfection. The wax will spread a little as it cools.
4. Pressing the Seal
Immediately after pouring, press your stamp into the wax. Hold it for a few seconds to let the wax set around the design. Then, gently lift it, revealing your beautiful seal.
5. Letting it Cool
Allow your wax seals to cool and harden for a few minutes. They should be solid and easily peel off the mat or paper.
6. Turning Them into Stickers
Now, here’s the sticker magic! Peel off your seal and attach an adhesive dot to its back. Alternatively, if using adhesive sheets, stick your seal on the sheet, then cut around it, leaving the backing intact until you’re ready to use it.
7. Storing Your Stickers
Place your wax seal stickers in a cool, dry place. A flat storage box or envelope works well. Ensure they don’t overlap, as this can cause them to stick together.
8. Personalizing Further
Get creative! Mix wax colors for a marbled effect. Or sprinkle some glitter on the seal before it hardens for added sparkle.
9. Practical Uses
These stickers are versatile! Use them to seal envelopes, embellish gift wrapping, or even as decorative elements in your scrapbook or journal.
Tips and Tricks for the Best Wax Seal Stickers
Temperature Matters: If your wax doesn't spread well, it might not be hot enough. Ensure it's fully melted and liquid before pouring.
Clean Your Stamp: After a few uses, your stamp might pick up wax residue. Wipe it with a damp cloth to maintain a clean impression.
Experiment with Size: Want bigger seals? Pour more wax! It's all about finding the size that works best for you.
Quality Matters: Not all sealing waxes are created equal. Invest in good quality wax for the best results.
Practice Makes Perfect: Don’t be disheartened if your first few seals aren’t perfect. With time, you’ll get a feel for the process.
Use the Right Adhesive: Ensure the adhesive you choose sticks well to the wax and your intended surface.
Explore Designs: From initials to intricate patterns, there are countless stamp designs available. Find one that resonates with you.
Wrapping Up
Making wax seal stickers is an enjoyable and creative process. By merging the classic art of wax sealing with modern convenience, you get a versatile tool ready for various applications. Whether you're an avid crafter or just someone looking for a unique touch for letters or projects, these stickers offer an elegant solution.