How To Make An Acrylic Keychain With Viny
June 30, 2024
Consider using vinyl to make acrylic keychains. It's a wonderful and enjoyable manner. Express your individuality and let your imagination run wild. Personalized keychains are easy to make and make wonderful presents or accessories. Come explore the fascinating realm of acrylic keychain crafting with me, and enjoy creating something one-of-a-kind!
Why the use of vinyl in keychain creation?

Vinyl is a robust and adaptable material that has become popular among enthusiasts and makers for several strong reasons:
Longevity and Durability: Vinyl keychains are remarkably resilient, meaning they can easily endure normal wear and tear.
Flexibility in Style: Because vinyl is so flexible, it can create incredibly detailed designs, allowing artists to fully express their imagination.
Cost-Effectiveness: For both producers and customers, vinyl offers a cost-effective option without sacrificing quality, making it a desirable option.
Lightweight and Portable: Because vinyl keychains are lightweight, their fashionable appeal increases with a dash of utility.
Resilience to Environmental Factors: Because vinyl is resistant to moisture and other environmental variables, it lasts longer and could potentially be used in a variety of climates.
How to Make an Acrylic Keychain with Viny?
Making your vinyl-encased acrylic keychain is an enjoyable and imaginative endeavor. Let's examine the supplies and equipment you will want for your do-it-yourself endeavor.
List of Materials Needed:
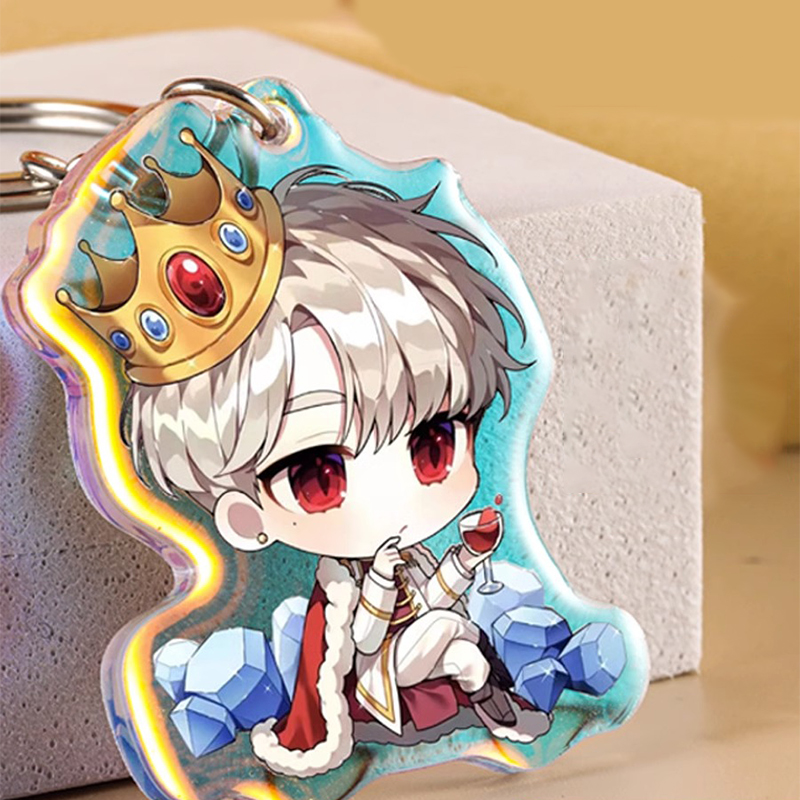
Acrylic Blanks: These serve as the foundation of your keychain, offering a clean, robust surface on which to place your design. To fit your artistic vision, select acrylic blanks in a range of sizes and forms.
Vinyl Sheets: The purpose of vinyl sheets is to create a colorful, personalized component for your keychain. To make your ideas come to life, use premium vinyl in a variety of colors.
Cutting Machine (eg, Cricut): To precisely cut out complex forms and patterns, a cutting machine is necessary. For example, the Cricut machine makes sure that the cutting process is accurate and efficient.
Weeding Tools: By removing extra vinyl from your design, weeding tools assist in maintaining sharp, clean edges.
Transfer Tape : Transfer tape serves the purpose of helping you move your cut vinyl design from the sheet to the acrylic blank.
Explanation of Each Material and Its Purpose
Acrylic Blanks: These form the base of your keychain and provide a clear area to display your artistic vision. They are available in a range of sizes and forms to accommodate diverse design tastes.
Vinyl Sheets: Bright and easily redesigned, vinyl sheets give your keychain character and color. Pick from a variety of hues to create striking contrasts or to complement your style.
Cutting machine (such as the Cricut): With this fine instrument, you can easily translate your design concepts into reality by making precise and detailed cuts in both acrylic and vinyl.
Weeding Tools: Weeding tools are necessary for complex patterns since they aid in removing extra vinyl, leaving a keychain that is neat and polished-looking.
Transfer Tape: A useful tool for accurately positioning and flawlessly finishing your cut vinyl pattern onto the acrylic blank.
How to Make an Acrylic Keychain with Viny?

When are you going to give your possessions a unique flair? A great approach to let your imagination run wild is to make your own vinyl acrylic keychain.
Step 1: Gather Your Supplies
Get all the supplies you'll need before beginning this fascinating project. You will need transfer tape, vinyl sheets in different colors, acrylic blanks (available at craft stores), a cutting mat, a weeding tool, and a keychain ring. Make sure you have a pair of scissors on hand so that this gets completed without difficulty.
Step 2: Design Your Keychain
Make a design for your keychain using free web tools or basic design software. To make it visually attractive, use bold colors and simple forms. To make sure your keychain is popular with younger customers, keep in mind that designs that appeal to children tend to perform well. Prepare for the next stage by saving your design!
Step 3: Cut the Vinyl
After positioning the vinyl sheet on the cutting mat, feed it into the cutting apparatus. Cut out the design precisely by following the directions in your design program. Younger artisans need to become guided during this process, with an emphasis on accuracy and safety. You 'll leave with a precisely formed vinyl pattern when the cutting machine completes its labor-intensive task.
Step 4: Weed the Design
Once the cutting process is over, trim any extra vinyl from your design with the weeding tool. This is also known as weeding, and it makes your design stand out. Kids ought to feel encouraged to take their time and enjoy this practical part of the project. It is like finding a hidden masterpiece!
Step 5: Apply Transfer Tape
Cut a piece of transfer tape that is marginally bigger than your vinyl pattern after it is weed-free. Make sure the transfer tape sticks effectively by carefully applying it over the vinyl. In this process, the design is more smoothly transferred from the vinyl sheet to the acrylic blank. It's an easy yet important step in the process.
Step 6: Transfer the Design
This is the exciting part now! Remove the vinyl backing gently, leaving the pattern on the transfer tape. Press down firmly after aligning the pattern on the acrylic blank. To guarantee a flawless transfer, flatten down any air bubbles. This is a great hands -on activity that will help students feel more confident about their creating skills.
Step 7: Peel Off the Transfer Tape
Peel the transfer tape off the acrylic blank gently after your vinyl design is firmly in place. To prevent any unintentional vinyl peeling, take your time. The fun starts to develop at this point as your keychain begins to take shape!
Step 8: Add the Keychain Ring
It's time to add the keychain ring as the last detail once your vinyl design has been properly applied to the acrylic blank. A snug fit is guaranteed when you insert the ring through the little opening at the top of the acrylic blank. To make your invention into a useful accessory, follow this easy yet important step.
Step 9: Personalize and Enjoy
You may now add any further decorations to your finished acrylic keychain. Take permanent markers and write your name, a favorite quotation, or perhaps a memorable date on them. Extra creativity and uniqueness are possible at this stage. You can now take your keychain with you on all of your excursions after it was carefully customized!
To sum up
You are now able to make your vinyl-crafted acrylic keychain. A great method to exhibit creativity and uniqueness, this do-it-yourself activity is entertaining for people of all ages. Enjoy a sense of satisfaction and happiness throughout the process of creating these keychains.